
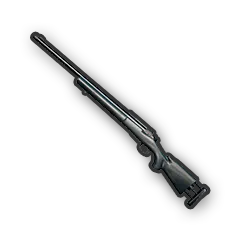
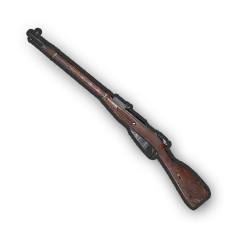
M24
SRBolt-action rifle with a detachable magazine.
The M24 is a bolt-action sniper rifle chambered for 7.62mm ammunition. Its detachable magazine distinguishes its reload handling from internally fed bolt-action rifles.
Select a weapon to view its damage stats
← Back to LeaderboardsQuick Compare
Compare M24 with other SR weapons

Supporting WinnerMeta
We rely on ads to keep the servers running.
Please disable AdBlock or Become a Supporter for an ad-free experience.
Ballistics & Fire Rate
Measured from real match telemetry — bullet velocity, fire rate, and travel time for the M24
Fire Rate
22 RPM
2710 ms between shots
Muzzle Velocity
860 m/s
R² = 0.97 (15 buckets)
Velocity Range
870.3–628.2 m/s
close to far range
Bullet Velocity by Distance
Measured bullet travel time from M24 shots in real matches (50–800 m, phase > 1.5). Velocity decays with distance due to drag.
Bullet Drop
How far the bullet falls below the aim point over distance, derived from measured flight time. Useful for comparing trajectory flatness between weapons.
Drop at 200 m
40.6 cm
1.82 mrad holdover
Drop at 400 m
167.1 cm
3.96 mrad holdover
Drop at 600 m
428.4 cm
6.88 mrad holdover
Bullet Drop by Distance
Estimated from real match flight times, median-aggregated per 50 m bucket. P75 shows upper spread. Negative values = bullet falls below aim point.
Supporting WinnerMeta
We rely on ads to keep the servers running.
Please disable AdBlock or Become a Supporter for an ad-free experience.
Usage Patterns & Trends
How and where players use the M24 in real matches
Performance Trends (Last 29 Days)
Effectiveness Trends
Hit rate and kill efficiency over time
Popularity Trends
Weapon usage share over time
Map & Circle Usage
By Map
Weapon usage % across maps (14d)
Circle Phase
Usage by circle number
Combat Distances by Map
Average engagement distances across maps
Distance Profile
Engagement distribution %
PUBG Weapon Damage by Body Part & Distance
Configure victim equipment and body parts to analyze PUBG weapon damage across distance ranges
Victim Equipment
Select armor to simulate damageM24
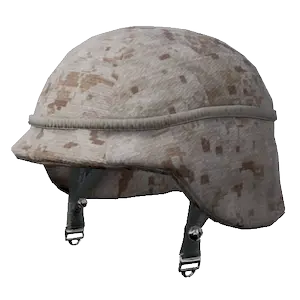
Military Helmet (Level 2)
40% damage reduction.
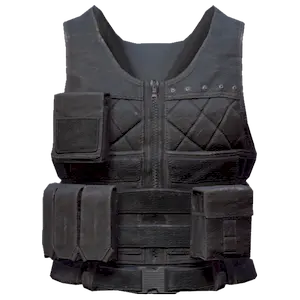
Police Vest (Level 2)
40% damage reduction.
Damage by Body Part
Toggle to compare damage valuesDamage Across Distance
Each bin is 25m (0–800m)Current configuration:
Attachment Statistics
Which attachments players use on the M24 — ranked by kill %. +pp / −pp shows the delta vs. the slot average across all attachments.
Scope / Sight
| Attachment | Usage % | Acc % | Kill % | Avg Dmg |
|---|---|---|---|---|
1Red Dot Sight | 0.0% | 88.06% +4.18pp | 21.64% +5.56pp | 52.3 -3.76 dmg |
2Holosight | 0.0% | 77.42% -6.46pp | 17.20% +1.12pp | 56.4 +0.34 dmg |
33x Scope | 0.4% | 83.40% -0.48pp | 16.47% +0.39pp | 56.5 +0.44 dmg |
42x Scope | 0.1% | 84.40% +0.52pp | 15.60% -0.48pp | 54.6 -1.46 dmg |
54x Scope | 13.3% | 83.73% -0.15pp | 15.15% -0.93pp | 57.0 +0.94 dmg |
—No attachment | 0.0% | 78.89% | 15.56% | 53.0 |
Muzzle
| Attachment | Usage % | Acc % | Kill % | Avg Dmg |
|---|---|---|---|---|
1Suppressor SR | 20.8% | 84.48% +0.03pp | 15.19% +0.21pp | 57.3 -0.07 dmg |
2Compensator SR | 24.4% | 84.38% -0.07pp | 14.96% -0.02pp | 57.5 +0.13 dmg |
3Flash Hider SR | 25.3% | 84.49% +0.04pp | 14.78% -0.20pp | 57.3 -0.07 dmg |
—No attachment | 29.5% | 83.99% | 14.74% | 57.5 |
Stock
| Attachment | Usage % | Acc % | Kill % | Avg Dmg |
|---|---|---|---|---|
1Cheek Pad | 77.7% | 84.35% 0.00pp | 14.92% 0.00pp | 57.4 0.00 dmg |
—No attachment | 22.3% | 84.17% | 14.81% | 57.3 |
Top Maps for M24
Best performing maps ranked by kills (last 14 days)
 Erangel
 Taego
Taego Rondo
Rondo Miramar
 Paramo
 Deston
 Sanhok
 Karakin
 Vikendi
| # | Map | Kills | Hit Rate | K/Shot | Avg Distance | Usage |
|---|---|---|---|---|---|---|
| 1 | Erangel | 379845 | 23.8% | 4.73% | 151m | 53.6% |
| 2 | Taego | 108512 | 23.0% | 4.04% | 155m | 18.0% |
| 3 | Rondo | 97181 | 22.3% | 4.17% | 165m | 15.6% |
| 4 | Miramar | 36927 | 20.5% | 3.24% | 181m | 7.6% |
| 5 | Paramo | 14446 | 27.6% | 5.86% | 146m | 1.6% |
| 6 | Deston | 12966 | 26.3% | 6.27% | 135m | 1.4% |
| 7 | Sanhok | 12440 | 29.7% | 7.70% | 113m | 1.1% |
| 8 | Karakin | 4857 | 25.4% | 5.42% | 138m | 0.6% |
| 9 | Vikendi | 3847 | 23.6% | 5.30% | 149m | 0.5% |
Explore Other Weapons
Compare damage stats across different weapon types and find your perfect loadout
Understanding the Data
Performance Metrics
- Hit Rate: Percentage of shots that connect with targets. Higher is better for accuracy.
- Headshot %: Percentage of hits that land on the head. Critical for damage output.
- Kill/Shot & Kill/Hit: Lethality metrics showing how deadly each shot or hit is.
- Dmg/Shot & Dmg/Hit: Average damage dealt per shot fired or hit landed.
- Shot/User Share: Popularity metrics showing weapon usage across matches.
Usage Pattern Charts
- By Map: Shows which PUBG maps this weapon is most popular on, helping you pick the right weapon for each map.
- Combat Distances: Average distances where players hit and kill with this weapon on different maps. Useful for understanding optimal engagement ranges.
- Game Phase: When players use this weapon during matches (Early/Mid/Late game). Circles (●) represent match progression.
- Distance Profile: Distribution of engagements across distances shown as percentages. Reveals the weapon's most common combat ranges.
Damage Range Chart (Main Chart)
The interactive chart above shows how weapon damage varies with distance and victim armor. Select different helmets and vests to see how armor affects damage to different body parts. Toggle hit zones (Head, Torso, Arm, Leg, etc.) to compare damage values. The "Current configuration" banner shows your selected setup.
Patch history
No published patch changes are linked to M24 yet.
About Our Data (Beta)
This feature is in beta. We collect and analyze millions of telemetry events from PUBG matches daily to bring you the most accurate weapon statistics possible.
What you should know:
- Missing data points: If you see gaps in the chart, it means we don't have enough sample data in that distance bucket yet to show it confidently.
- Unusual values: Some values may appear unexpected as we continue to refine our analysis algorithms and collect more data.
- Continuous improvement: Our data collection and processing systems are constantly being improved to provide better accuracy.
Found something wrong or have feedback? Contact us and let us know what we can improve!
Supporting WinnerMeta
We rely on ads to keep the servers running.
Please disable AdBlock or Become a Supporter for an ad-free experience.